

5 Classroom Decor Tips and Tricks

I'm genuinely passionate about decorating my classroom. Over my 10 years of teaching, my classroom design skills have significantly evolved, thanks in part to the incredible inspiration from fellow educators on social media. I’ve picked up quite a few tips and tricks along the way. Here are five helpful tips to consider before you start decorating your classroom.
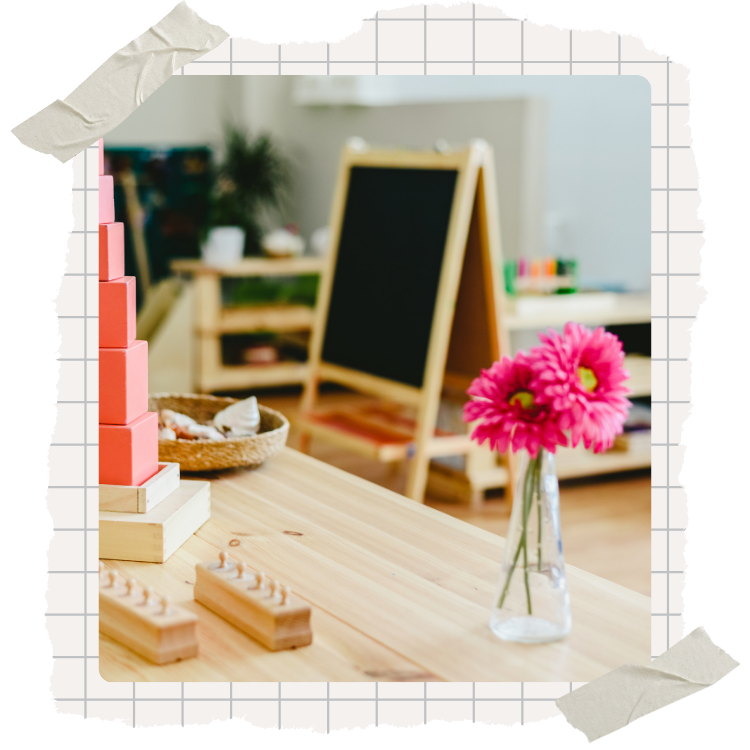
Here's a sneak peek of my current classroom. As you can tell, I like to go all out! But don't let the extravagance fool you—the tips below are practical and easy to apply.
Tip #1:
Resist the urge to buy too much before seeing your classroom!
I get it—it’s hard to hold back on those tempting purchases before you’ve had a chance to see your classroom. But try not to go overboard... just yet. 😉
Side Note: Whether you prefer a minimalist approach or love to go all out, don't let anyone make you feel bad about your choice. While a beautifully decorated classroom can be a joy, a minimal space can be just as effective. Ultimately, it’s not the decor that matters most—it’s the relationships you build with your students. As much as I adore walking into my perfectly pastel classroom, what really counts is the connection you create with your students.
Now, back to Tip #1. Hold off on buying too much for your classroom, at least as much as your willpower allows. Keep reading to find out what you should consider before diving into your classroom decor shopping!

Tip #2
Don't overspend.
You can create a really cute classroom without spending a fortune—or any money at all! If you’re on a tight budget, take advantage of the resources your school provides, like bulletin board paper, printing services, and free decor from sites like Teachers Pay Teachers. Every school offers different materials, so make the most of what’s available.
If you’re looking to save money, consider checking out yard sales, thrift stores, and Facebook Marketplace. You can also ask family and friends if they have any materials you need—they might be happy to donate items they no longer use.
I know it can be tough to ask for help, but your loved ones will usually be glad to support you and your students.
And if you do have the budget for a shopping spree, go for it! Have fun with the process and don’t feel guilty about it. Everyone’s situation is different, so do what works best for you.

Tip #3
Choose your colors.
Focus on selecting a versatile color palette rather than committing to a specific theme like Disney or Jungle. That doesn’t mean you can’t incorporate themes at all—stay tuned for more on that in Tip #4!
Start by choosing colors that you’ll enjoy long-term, ideally for a couple of years. Begin with a neutral base, like white or black, and then add accents in your chosen colors. These base colors are perfect for bulletin board paper or wall coverings (especially if you need to cover corkboard walls).
To find your ideal color palette, I recommend going on Pinterest and pinning classroom designs or decor that catch your eye. You can even look at bedroom or home decor for inspiration—just pin whatever resonates with you. Once you’ve built up your board, notice which colors you’re gravitating toward most. Then, clean out your board by removing pins that don’t fit the overall vibe. This will help you identify a coherent color palette that suits your style.
As I mentioned, start with a neutral base color. You can add a secondary base color if you like, but try not to exceed two base colors, and keep them muted or calming. Then, decide whether you want bright colors, more neutrals, or pastels for your accents. Personally, I wouldn’t limit yourself to just two or three specific colors, like pastel blue and pink, as this could become tiresome or restrictive.
For my current classroom, I chose white as the base color, with baby blue as a secondary base, and colorful pastel shades for the accents.
Here are some great color palette ideas that offer plenty of variety:
White or black with colorful pastels
White with neutral tones like tan, taupe, beige, and brown (This is cute but more limited; keep in mind that student work and supplies, especially in younger grades, are often more colorful.)
White or black with bright pastels

Example:
You can see I chose white as my base color, and baby blue as my secondary base color, then brought in accents of other pastel colors, with a touch of a theme (smiley faces).
Tip #4
Don't overdo the theme!
In the picture above, you’ll notice that I’ve added a touch of my theme—yes, there are quite a few smiley faces! But here’s the beauty of it: if I ever get tired of the smileys (which I doubt I will), I can easily switch things up without overhauling the entire room. All I’d need to do is swap out the carpet and a few wall printouts, and voilà—instant refresh!
Pastels are my go-to because they’re so cheerful and colorful, yet still incredibly calming.
Themes are fantastic and can be a lot of fun, but my advice is to design your classroom so that you can easily change themes without redoing everything. Trust me, I’ve been there! I once went all out with a Disney Coco theme, and while it was adorable, I was over it after just one year.
If you like the theme I’ve created, I highly recommend checking out Rachel Burnett on Teachers Pay Teachers. I got a lot of inspiration from her classroom decor bundles!
Tip #5
Don't Over-Clutter
I emphasize not "over" cluttering for a reason. Let’s be real—classrooms naturally have more clutter than most other spaces. We need to fit so much into our classrooms: 24-36 student desks, a classroom library, supply stations, small group areas, a spot for technology carts, and sometimes even flexible seating options. So yes, the room will be somewhat cluttered by default. That’s why it’s important not to over-buy.
Before purchasing anything, start by arranging the furniture provided by the school. Set up your room first! Move the existing furniture around to where you think it will work best. If you’re unsure how to arrange the desks, the classic rows are always a reliable option. I often revert to rows because they take up the most space, which helps me see how much room I have left. Once the desks are set up, you can identify any empty spaces and decide how to utilize them. And if you’re not sure right away, that’s okay—sometimes the best ideas come as the school year progresses.
When it comes to wall decorations, it’s great to have helpful references for students, but don’t overdo it. First, check if your school requires specific items on the walls. Make sure to find this out before buying or putting up anything. For example, I once worked at a school that required the phonetic alphabet at the front of every classroom, even though I was teaching fourth grade! So it’s always good to ask.
It’s also important to leave some negative space on the walls. I used to try to fill every single space, but over time, I realized that having some clear areas made the room feel less overwhelming and overstimulating. If you look at the pictures I posted, you’ll notice some areas of blank wall space—just enough to keep the room from feeling too busy. These clear areas help my classroom look cleaner and more organized. I also designate one specific area of the room for displaying student work, which helps maintain a sense of order.
During your classroom setup, take your time with wall decor. Put it up gradually until you find a balance that feels just right for you.

Hope I leave you with some inspiration.